

Are you struggling with inconsistent water pressure due to a failing well pressure tank? A malfunctioning system disrupts your reliable water supply. Tackle this challenge immediately to secure consistent water flow for your home.
Your task is to safely replace the pressure tank before issues worsen. You can minimize water outages and costly repairs by following expert guidance. As Fergusons Plumbing explains, proactive maintenance is key to lasting performance.
They provide practical steps and clear instructions to replace your well pressure tank efficiently. You benefit from improved system reliability and energy savings when you address issues with focused attention and timely action.
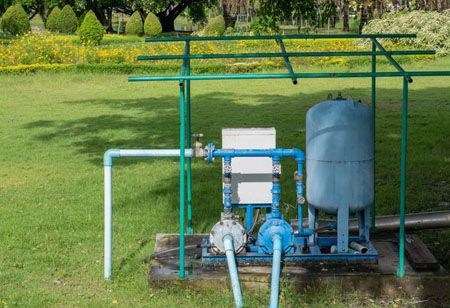
Pressure Tank Fundamentals
Understanding the core principles of a pressure tank helps you sustain strong water pressure while providing a stable, efficient water supply throughout your entire home.
This bullet list highlights the essential fundamentals you need to grasp to maintain a dependable and properly functioning pressure tank system.
● Function and Purpose: It stores water under pressure, ensuring your household has continuous water flow and consistent pressure when demand
increases.
● How It Works: Water and compressed air work together inside a tank, allowing pump activation until the target pressure of 40-50 psi is reached.
● Types of Pressure Tanks: It includes diaphragm tanks with a flexible disc separating air and water, or bladder tanks using a balloon-like structure.
● Key Components: The pressure switch is critical as it governs pump activity by monitoring pressure levels inside the tank.
● Common Issues: Frequent cycling or leaks may indicate a problem with the tank and require immediate maintenance to restore efficiency.
● Maintenance Tips: Regular air pressure checks, cleaning, and repairs ensure that your system operates at peak performance.
These fundamentals provide a solid foundation for understanding how your pressure tank maintains water pressure and ensures a reliable water distribution system across your home.
Installation Preparation Steps
Prior to installing your new pressure tank, careful preparation is vital to guarantee a seamless process and minimize potential setbacks during installation.
The following bullet list outlines the essential preparation steps needed as you get ready to replace an existing well pressure tank in your system.
● Assess Water Needs: Evaluate your household water consumption to determine the right tank size that prevents excessive pump cycling.
● Shut Off Power and Water Supply: Always cut the power and water; it ensures the safety of you and your equipment during the installation.
● Drain the Old Tank: Connect a garden hose to the drainage valve and open faucets to quickly and effectively remove all water.
● Disconnect the Old Tank: Use two pipe wrenches on opposite sides to release fittings before gently removing the old tank.
● Prepare the New Tank: Install plumbing and water lines using threaded couplings along with thread sealant and plumber's tape for secure
connections.
● Mount the New Tank: Secure it on a level, sturdy surface using appropriate brackets to prevent any future stability issues.
● Connect the Plumbing: Attach input and output lines carefully, making sure each connection is tight and watertight with proper sealing.
● Electrical Connections: Follow the manufacturer's guidelines when wiring the pressure switch to avoid any electrical mishaps.
● Set the Precharge Pressure: Align the pressure a few psi below the cut-in value to ensure optimal pump performance and system efficiency.
● Test the System: Turn on both water and power to verify there are no leaks and that the system operates as intended.
By following these detailed preparation steps, you ensure that every aspect of the installation is covered, leading to a successful pressure tank replacement without
unexpected delays.
Old Tank Removal Process
Before you begin removing the old pressure tank, it is essential to follow safe procedures and carefully prepare the area for the upcoming installation tasks.
Turn Off Power and Water Supply
First, disconnect all electrical power to the pump and tank while also shutting off the water supply. Safety is your primary concern.
Drain the Tank
Connect a garden hose securely to the drainage valve; open a few taps in your home to allow water to drain, ensuring the tank empties fully.
Disconnect the Tank
Use two pipe wrenches set in opposite directions to loosen the fittings that secure the tank to your plumbing supply, carefully disconnecting it.
Remove the Old Tank
Lift the tank out of its mounting position. If bolted to a concrete pad, use a socket and ratchet to remove the fasteners safely.
Preparation for the New Tank
Clear the installation area to ensure there is ample room for the new unit. Verify that all connections have been properly detached before proceeding.
New Tank Setup Guide
Setting up a new pressure tank requires careful attention to detail and adherence to standard procedures, ensuring optimal efficiency throughout the system.
Selection and Preparation
Select a tank that meets your water usage needs; typically, the usable water equals roughly one-third of the overall tank volume, ensuring efficiency.
Installation Process
After shutting off power and water, drain the old tank completely. This prevents unwanted water mixing and makes removal safer and more efficient.
Connection and Testing
Attach the plumbing and water lines securely. Verify all sealed connections, then follow electrical instructions to connect the pressure switch reliably.
Post-Installation Checks
Test the newly connected system by restoring power and water; observe whether the pump activates properly and check the tank for leaks consistently.
Important Safety Measures
Always consult the manufacturer's installation instructions and wear appropriate safety equipment, including gloves and eye protection, during your work.
General Tips
Select a tank slightly larger than your demand estimate to avoid rapid pump cycling, ensuring longevity and better performance of your water system.
Detailed Installation Procedure
Following a detailed installation procedure is essential to successfully replace your pressure tank while ensuring that every connection is safe and secure.
Pre-charge Procedures and Safety Measures
Begin by turning off the power to your well pump and closing the main shut-off valve, ensuring that no water siphons back into your system unexpectedly.
Checking the Air Charge
Use a tire pressure gauge at the air valve stem to confirm proper charge. For a 30-50 PSI switch, aim for 28 PSI, observing all manufacturer recommendations carefully.
Recharging the Pressure Tank
Attach an air compressor, monitoring the reading closely as you refill the tank until the correct pressure is reached, thus preventing overinflation issues.
General Precautions
Throughout the process, never rush crucial steps; regularly verify connections and pressure settings to protect your system and enhance overall safety.
System Testing and Checks
After installing your pressure tank, consistent system testing and regular checks are essential to ensure that the water pressure remains stable and reliable.
The bullet list below outlines key testing procedures that keep your system in optimal shape while identifying any issues immediately for prompt resolution.
● Water Pressure Check: Use a gauge at your faucet to verify readings are within 40-60 PSI, confirming proper operation.
● Physical Damage Inspection: Carefully examine the outer shell of the tank for dents, rust, or corrosion that could threaten its durability.
● Tap Test: Lightly tap the tank to discern hollow sounds in the air chamber, indicating it functions correctly, while solid tones signal waterlogging.
● Hydrostatic Pressure Testing: Fill the tank beyond operating pressure to detect potential leaks or structural faults before problems arise.
● Pressure Switch Adjustment: Ensure that the tank pressure is doubled below the cut-in value, maintaining a delicate balance within your water system.
● Pressure Cycling Test: Open a faucet and observe the cycle timing; an extended refill period confirms healthy pressure regulation and effective pump
operation.
Regular testing and checks help you quickly spot and address any potential issues, keeping your system operative and protecting your valuable water resources.
Maintenance and Troubleshooting Tips
Consistent maintenance and prompt troubleshooting are crucial steps in prolonging the life of your pressure tank and ensuring it provides steady water pressure over time.
Maintenance Tips
Conduct regular inspections to spot rust, leaks, or corrosion early; proper cleaning and timely adjustments keep your pressure tank functioning efficiently and prevent costly repairs.
Focus on key areas such as visual inspections, pressure setting verifications, and the integrity of all fittings and pipes.
Troubleshooting Tips
Pay attention to signs of waterlogging including frequent pump cycling and reduced water pressure. Begin troubleshooting by safely draining the tank and rechecking air
pressure carefully.
Adjust the air charge if necessary, and perform tests after each correction, ensuring that your system returns to optimal performance without further issues.
Final Steps Ahead
You have taken essential steps to replace your well pressure tank, ensuring a safe and efficient water system. Now you can enjoy enhanced system performance with
confidence. Visit Ferguson Plumbing FAQs for additional expert guidance when you need reliable advice quickly. Your future maintenance will be easier and stress-free,
indeed.
We use cookies to ensure you get the best experience on our website. Read more...
Copyright © 2025 HomesIndiaMagazine. All Rights Reserved.
